Meta and Microsoft have partnered to make it possible for Quest users to connect with their Windows 11 PCs. The feature will allow users to mirror their PC with a single tap — exactly how it works on the Vision Pro.
In this article, let’s explore more about the beta version of meta quest 3 and windows 365 virtual capabilities feature, its limitations and benefits.
What Can You Do By Pairing Quest and Windows PC?
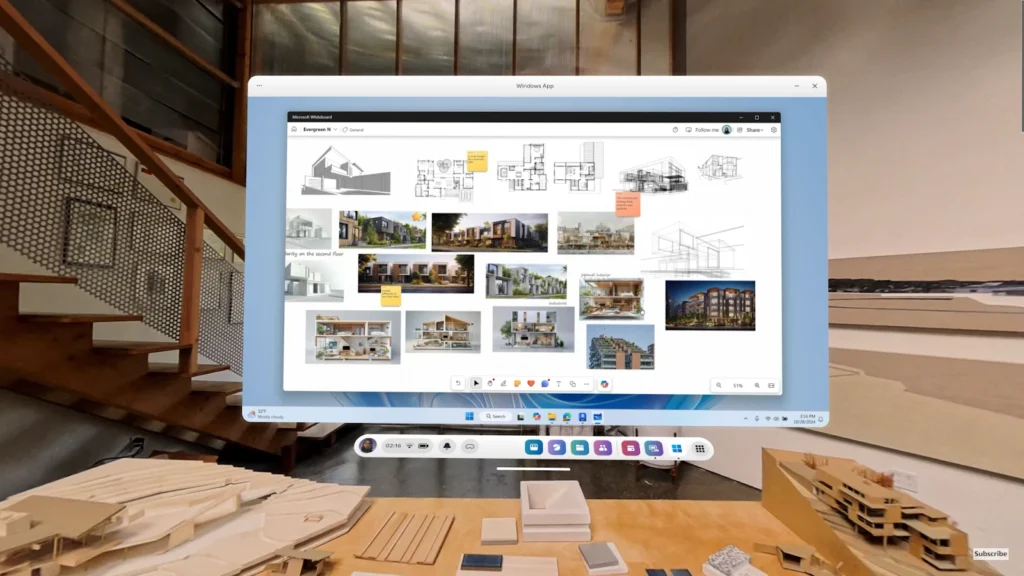
The main feature of pairing the Quest headset and Windows 11 PC is ‘mirroring’. By connecting the headset and PC, you can access your computer screen virtually. Moreover, you can access all your files and apps from the PC.
With the Windows 365 Cloud PC subscription, you can access your cloud data virtually. The subscription also allows you to create up to three virtual monitors to work on. As of now, you can move your customized monitors for increased productivity.
Prerequisites to Connect Meta Quest and Windows 11
- A Meta Quest 3 or Quest 3S Headset: The pairing feature isn’t supported on Quest 2 or Quest Pro.
- Windows 11: Your Windows 11 PC must be running Windows 11 22H2 or a newer version.
- Horizon OS: Your Quest headset must be running Horizon OS v72 or a newer version.
- Supported GPU: It must be NVIDIA GTX 1060 or at least equivalent.
- Network: Your PC and Quest headset must be connected to the same network. The Wi-Fi spectrum should be 5Ghz or 6Ghz. Lastly, the Wi-Fi must be 802.11ac or higher.
How to Set up Quest and Windows PC?
Since this is still an early stage for Windows’ virtual capabilities, you have to take a few extra manual steps. Follow the steps below to set up your Meta Quest and Windows 11:
- Install the Mixed Reality Link from the Microsoft Store on your PC.
- On your Meta Quest, press the ‘Menu’ button on your right Touch controller to open the universal menu.
- On the left side of the universal menu, select the clock to open Quick settings.
- Now, select ‘Settings’ on the top right corner, and then click on ‘Advanced’.
- Click on the toggle next to ‘Pair to PC with Mixed Reality Link’. This will pair your PC and Quest headset.
Using the same toggle, you can turn this feature on or off. If you can’t find the “Pair to PC” setting, make sure that your headset is running Horizon OS v72 or a newer version.
You may also read: – How to Learn New Languages Using Virtual Reality Software?
How to Pair & Reconnect Your Quest 3 and Windows PC?
Once your Meta Quest headset and PC are set up, follow the steps given below to pair them:
- Have your PC nearby, powered on and unlocked. Also, put on your Quest headset.
- Once your PC is detected, you will see a prompt right above your keyboard to pair your PC.
- Follow the instructions mentioned in the prompts to complete pairing your Quest and PC.
In case you don’t see the button over your keyboard, you can also pair by opening the Remote Desktop app. Open the app and select “Add Computer”.
To reconnect the Quest headset and PC:
After pairing you can reconnect to your PC easily by unlocking it, looking at the keyboard and selecting the “Connect” button. You can also reconnect from “Quick Setting” in the Remote Desktop app.
Conclusion
The partnership of Meta and Microsoft seems very promising in terms of user experience. Although it’s similar to the way Apple Vision Pro works, it still is in early stages. Meta and Windows don’t offer enough optical clarity as the Vision Pro.
Possibly, Meta may still take a moment to make virtual monitors reach that level. As of now, third-party applications like Virtual Desktop and Immersed are the best to get virtual monitors for Quest users.